What to Do to Get Started!
Before you can start editing your Customizable Agent Website , you will first need to Create a New Website !
Click here to learn how to create your new Customizable Agent Website
We also suggest that you update some of your MetroList.com Account Settings before starting your Website Editing.
Click here to learn how to upload your Company Logo
Click here to learn how to update your Market Areas, Languages and Specialties
Click here to learn how to add your Social Media Links
Common Website Customizations
How to Change the Images in the Home Page Photo Rotator

- Click on the Websites Tab
- Click on the Customizable Website you would like to revise
- Click Start Revision and then Edit Revision (or just click Edit Revision)
- Hover your mouse over the home page photo and click Click to edit Image Rotation
- Click Edit This Content
- Once inside of the Image Rotator Editor, choose between Upload Manually or Listing Images
- To choose a Full Screen image from the image library, scroll down to the Add Image To Rotation section
- Click Choose Image
- Click Global Images
- Click Real Estate
- Click Full Screen
- From there you can go into the different folders with different types of Full Screen images to choose from
- Click on any image to preview it
- Once you have scrolled through and found the image you would like to add, click on the image to select it
- Then click Insert
- The photo will appear in the Add Image To Rotator section, click Add Image
- The image then appears in the Your Current Images section, at the bottom
- To move the order of the images, click on the up or down arrows (∧ ∨)
- You can also change the speed at which your images rotate, to do so scroll down to Display Options
- And input however many seconds you would like the Rotator Speed to be
- Once you are finished, click Save Changes
- Then click Close
*Keep in mind that in order to see the changes you have just made to your website, click Back to Edit My Website in the top left hand corner of the page and click Publish Revision
How to Change the Interactive Map Search Default Settings

How to Change Your Map Search Default Location
- Click the Websites Tab
- Click on the Customizable Website you would like to revise
- Click Start Revision and then Edit Revision (or just click Edit Revision)
- At the top of the page, click the Map Search Options button
- In the Website Map Search Options page, locate the Default Location option
- Click in the field for Default Location and press backspace
- Start typing the City or County you wish to set as your default location and select it from the auto-complete drop-down
- Click Save Changes
*Keep in mind that in order to see the changes you have just made to your website, click Back to Edit My Website in the top left hand corner of the page and click Publish Revision
Additional Map Search Options Settings
If you would like to edit additional default Map Search Options, do so from the Map Search Options page. Here you can do the following:
- Choose Yes or No to Prioritize My Listings
- Choose the Default Sorting of listings
- Choose to Disable Transaction Types
- Choose the Default Transaction Types
- If you leave all of the check boxes unchecked, the default option will populate Active Listings on your map search, it is okay to leave the boxes unchecked here
- Choose to Customize Property Types displayed on your Map Search
- There is a column for Visible and for Default, if you check the box for Visible but not for Default, that property type will be visible on your website, but will not be automatically selected by default
*Keep in mind that in order to see the changes you have just made to your website, click Back to Edit My Website in the top left hand corner of the page and click Publish Revision
How to Change Featured Properties Filtered Search Settings

How to Change Your Featured Property Default Location
- Click the Websites Tab
- Click on the Customizable Website you would like to revise
- Click Start Revision and then Edit Revision (or just click Edit Revision)
- Scroll down on the home page to the Featured Properties section
- Click on Click to edit Filtered Search Results
- Click Edit this Content
- Click in the field for Default Location and press backspace
- Start typing the City or County you wish to set as your Featured Properties Filter Search Settings and select it from the auto-complete drop-down
- Click Save Changes
*Keep in mind that in order to see the changes you have just made to your website, click
Back to Edit My Website in the top left hand corner of the page and click
Publish Revision
How to Use 'Layers' to Change Your Featured Property Default Location

- Click Websites
- Click your Website
- Click Start Revision
- Click Edit Revision
- Click Layers
- Under Main Content, Right Click on Filtered Search Results
- Click Edit Control
- Under Default Location, type in what location you’d like to use for your featured listings (e.g. Sacramento, CA)
- Click Save Changes
- Click Ok
Additional Featured Property Filtered Search Settings
If you would like to edit additional default Featured Property Filtered Search Settings, do so from the Featured Property Filtered Search Setup page. Here you can do the following:
- Choose how many Listings to Show
- Choose the Featured Property Default Transaction Type
- Choose the Selection Method - Here you can choose from the following options:
- All Listings
- Filtered By Office
- Filtered By User Group (only select this if you are using a MetroList.com Team Solution)
- My Listings
- Choose the Default Search Price (Min) and/or (Max)
- Choose the Listing Types to Search
- We suggest to leave this set to For Sale as MetroList does not display Rental Properties at this time
- Choose to Search Bank Owned Properties
- Choose to Only include open houses
- If you would like to display listings with AND without open houses, leave this settings set to Any
- Choose certain Property Types displayed in your Featured Properties section
- If you leave all of the check boxes unchecked, the default option will populate all Property Types in your Featured Properties section, it is okay to leave the boxes unchecked here
How to Add or Remove Menu Items/Pages to the Top-Level Navigation
How to Add Areas, Neighborhoods or Communities to the Top-Level Navigation

*If you are using the MetroList.com
'Portfolio' Template, a
Communities Top-Level Navigation is already added for you
- Go to your website or to MetroList.com
- Search for the city you’d like to highlight in your Areas/Neighborhoods/Communities section (e.g. Sacramento, CA)
- In the URL select where it says /search and everything that comes after
- Copy your selection (e.g. search/For_Sale/Sacramento_3_CA/map_9qc6xdfw5;9qcu27dbx)
- Go back to your MetroList.com Dashboard
- Click on the Websites Tab
- Click on the Customizable Website you would like to revise
- Click Start Revision and then Edit Revision (or just click Edit Revision)
- At the very top of your website towards the right-hand side, click- where it says Click to edit Primary Navigation- Responsive
- Click Edit this Content
- Click Add Top Level Menu Item
- Click in Menu Description and type in what you would like this menu item to be called (e.g. Communities)
- Leave the Go To setting as Go To Page: Home Page
- Click Add Menu Item
- Hover your mouse over the menu item you just added (e.g. Communities) and click Add Menu Item
- Click in the Menu Description and type in the City you searched for above (e.g. Sacramento)
- Select Go To URL:
- Paste in the URL that you copied from your website or MetroList.com (e.g. search/For_Sale/Sacramento_3_CA/map_9qc6xdfw5;9qcu27dbx)
- Click Add Menu Item
- Click Close
- To add more Areas, Neighborhoods or Communities to your Top-Level Menu, repeat these steps with as many cities as you’d like
*Keep in mind that in order to see the changes you have just made to your website, click
Back to Edit My Website in the top left hand corner of the page and click
Publish Revision
How to Add Blog Articles to the Top-Level Navigation

*If you are using the MetroList.com
'Advantage' or 'Portfolio' Template, a
Blog Top-Level Navigation is already added for you
- Click on the Websites Tab
- Click on the Customizable Website you would like to revise
- Click Start Revision and then Edit Revision (or just click Edit Revision)
- At the very top of your website towards the right-hand side, click- where it says Click to edit Primary Navigation- Responsive
- Click Edit this Content
- Click Add Top Level Menu Item
- Click in the Menu Description and type in ‘Blog’ or 'Articles'
- Select Go To URL:
- Type in /articles
- Click Add Menu Item
- Click Close
*Keep in mind that in order to see the changes you have just made to your website, click
Back to Edit My Website in the top left hand corner of the page and click
Publish Revision
How to Remove Pages from the Top-Level Navigation

- Click on the Websites Tab
- Click on the Customizable Website you would like to revise
- Click Start Revision and then Edit Revision (or just click Edit Revision)
- At the very top of your website towards the right-hand side, click- where it says Click to edit Primary Navigation- Responsive
- Click Edit this Content
- Hover over and click on the Menu Item that contains the Sub-Menu Item or Page you would like to remove
- Once inside of the Website Navigation Menu Editor, click Delete on the Menu Item, Sub-Menu Item or Page you would like to remove
- Click OK when the message "Are you sure you want to delete this menu item?" appears
- Click Close
*Keep in mind that in order to see the changes you have just made to your website, click
Back to Edit My Website in the top left hand corner of the page and click
Publish Revision
How to Change Your Home Page Main Heading (e.g. Your Journey Starts Here)
- Click the Websites Tab
- Click on the Customizable Website you would like to revise
- Click Start Revision and then Edit Revision (or just click Edit Revision)
- At the top of the page, click Layers
- Locate where it says Main Content Top 2, then right click on HTML Block
- Click Edit Control
- Inside of the Content Editor, type in your desired text (e.g. Find your Dream Home in Sacramento)
- Click Save Changes
- Click OK
*Keep in mind that in order to see the changes you have just made to your website, click
Back to Edit My Website in the top left hand corner of the page and click
Publish Revision
How to Position Your Logo in the Header

- Click the Websites Tab
- Click on the Customizable Website you would like to revise
- Click Start Revision and then Edit Revision (or just click Edit Revision)
- On the upper left-hand corner of the page, where your agent profile picture is, click on Click to edit Logo – Responsive
- Click Background, Size & Border
- If you would like to move your logo up in the header for example, in the field next to Margin Top insert -5
- Click Save Changes
*Keep in mind that in order to see the changes you have just made to your website, click
Back to Edit My Website in the top left hand corner of the page and click
Publish Revision
How to Change Your Website SEO Settings and Page Properties

How to Change Your Website SEO Settings
- Click the Websites Tab
- Click on the Customizable Website you would like to revise
- On the right site of the Manage Website page, locate where it says My SEO Settings.
- In the fields for Brower Title, Description and Keywords type in your desired text (e.g. [First Name] [Last Name] Real Estate in Sacramento)
- If you have META data you would like to add to your website, the META 1 Name and META 1 Content fields are where you would input that data
- Once you are finished, click Save Changes
*Keep in mind that in order to see the changes you have just made to your website, click
Back to Edit My Website in the top left hand corner of the page and click
Publish Revision
How to Change Your Website Page Properties
- Click the Websites Tab
- Click on the Customizable Website you would like to revise
- Click Start Revision and then Edit Revision (or just click Edit Revision)
- At the top of the page, click Page Options
- Once inside of the Edit Page Properties page, you can edit the Browser Title, Description and Keywords
- Once you are finished, click Save Page
*Keep in mind that in order to see the changes you have just made to your website, click
Back to Edit My Website in the top left hand corner of the page and click
Publish Revision
How to Change or Remove the Pages/Lead Forms on Your Website

How to Edit or Change the Lead Forms on Pages
- Click the Websites Tab
- Click on the Customizable Website you would like to revise
- Click Start Revision and then Edit Revision (or just click Edit Revision)
- At the top of the page, click Select Page
- Here you will see a list of the different Pages on your website, locate and click on the page (Lead Form) you would like to edit
- Hover over the box that says Click to edit Lead Form
- Inside of the Lead Form Setup page are all of the settings for this Lead Form, if you would like to choose a different type of lead form or edit the current lead form, click Choose Form
- Here you will see all of the different Lead Forms available to choose from, if you would like to choose a different lead form without editing it, click Choose next to your desired Form Name
- If you would like to edit the Lead Form that currently displays on the page you are updating, click Copy next to the Form Name you would like to use as a new Lead Form Template
- Type in the New Name for the Lead Form you would like to create and edit
- Click Copy Form
.png)
- Scroll to the bottom and click View/Edit Form next to the New Form you just created
- Now that you are inside of the Edit Form page, you can do the following:
- Edit Form Name, Description, Opportunity
- Edit Form Fields
- Move Form Fields
- Delete Form Fields
- Add Field
- Add Category
- Once you are done editing, click Done Editing
- Click Choose next to the Form you just created to use on the page you are updating
- If you would like to update any additional settings to the Lead Form, do so in the Lead Form Setup page
- Once you are finished making changes, click Save Changes
*Keep in mind that in order to see the changes you have just made to your website, click Back to Edit My Website in the top left hand corner of the page and click Publish Revision
To learn how to remove a page from your website, refer up above to the section called "How to Remove Pages From the Top-Level Navigation"
How to Edit or Remove "Call Outs" on your Home Page

How to Edit the "Call Outs" on Your Website
- Click the Websites Tab
- Click on the Customizable Website you would like to revise
- Click Start Revision and then Edit Revision (or just click Edit Revision)
- Scroll down to the section you would like to edit
- Hover over and click on the box that says Click to Edit HTML Box
- Click Edit This Content
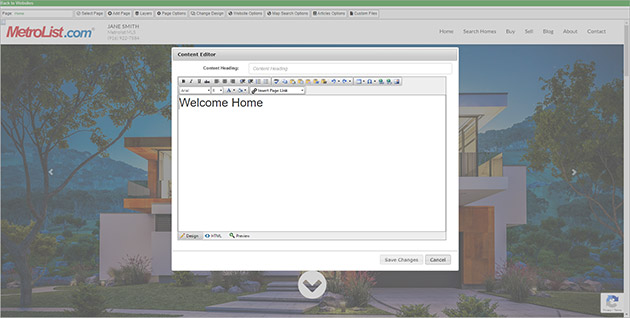
- Inside of the Content Editor, make the desired changes to the content
- Click Save Changes
*Keep in mind that in order to see the changes you have just made to your website, click Back to Edit My Website in the top left hand corner of the page and click Publish Revision
How to Remove "Call Outs" From Your Website

- Click the Websites Tab
- Click on the Customizable Website you would like to revise
- Click Start Revision and then Edit Revision (or just click Edit Revision)
- Scroll down to the section you would like to edit or remove
- Hover over and click on the box that says Click to Edit HTML Box
- If you do not see an option to Delete This Content, click Advanced
- Check the box next to Allow Delete
- Click Save Changes
- Again click on the box that says Click to Edit HTML Box
- Click Delete This Content
- Click OK when the message "Are you sure you want to delete this menu item?" appears
- Click Save Changes
*Keep in mind that deleting sections or "call outs" from your website will permanently affect the design of your website. If you delete something by mistake, it may not be irreversible and may result in having to start over with a brand new website.
*Keep in mind that in order to see the changes you have just made to your website, click Back to Edit My Website in the top left hand corner of the page and click Publish Revision
How to Edit the Footer of Your Website

How to Change Your Information in the Footer
- Click the Websites Tab
- Click on the Customizable Website you would like to revise
- Click Start Revision and then Edit Revision (or just click Edit Revision)
- Scroll all the way to the bottom of your website where the Footer is located
- Hover over the section you would like to edit and click Click to Edit HTML & Text with Variables - Responsive
- Click Edit This Content
- Inside of the Content Editor update the desired content
- Once you have made the desired changes, click Save Changes
*Keep in mind that in order to see the changes you have just made to your website, click
Back to Edit My Website in the top left hand corner of the page and click
Publish Revision
Learn More About Editing Your Website
1
Let's connect and get started today!
MetroList.com Website Support
916-922-7584 Ext. 685
websitesupport@metrolist.com
Contact us today for even more:
- Find out about our latest deals. Don't forget to ask about free setup!
- Learn how MetroList.com can help with your specific marketing software needs and help grow your business.
- Get answers to any questions you have about MetroList.com.